Be sure to put this at the top:
Add-PSSnapin“Microsoft.SharePoint.PowerShell”

Be sure to put this at the top:
Add-PSSnapin“Microsoft.SharePoint.PowerShell”
In order to run anything it seems like successfully in a dev environment, you will have to run the following in PS.
Set-ItemProperty -Path “HKLM:\Software\Microsoft\Windows\CurrentVersion\Policies\System” -Name “EnableLUA” -Value “0”
shutdown -r -t 0
You can use this to recreate a table based on a view/table:
DECLARE @TABLE VARCHAR(80) = ‘YOUR_TABLE_HERE’
SELECT COLUMN_NAME,
(
CASE WHEN CHARacter_maximum_length IS NOT NULL THEN UPPER(DATA_TYPE) + ‘(‘ + CAST(CHARacter_maximum_length AS VARCHAR(MAX)) + ‘)’
ELSE UPPER(DATA_TYPE) END
) DATA_TYPE
FROM information_schema.columns
WHERE TABLE_NAME = @TABLE
OR
If you want to just recreate the table do this:
SELECT * INTO TBL_TEMP FROM TABLE_NAME
Also to Cache data, do this:
TRUNCATE TABLE CACHE_TABLE_HERE
INSERT INTO CACHE_TABLE_HERE
SELECT * FROM SOURCE_DATA_TABLE_HERE
SELECT * FROM CACHE_TABLE_HERE
I had issues trying to research and find a way to add to my Quick Launch menu or my Top Navigation menu, programmatically. This was a huge challenge. One of my employees found this link: http://www.anmolrehan-sharepointconsultant.com/2011/09/sharepoint-working-with-quicklaunch.html. This was something we were able to start out with to add items to the quick launch. I further modified it as shown below, and hope this is something that you can use.

using System;
using System.Web.UI;
using System.Linq;
using Microsoft.SharePoint;
using Microsoft.SharePoint.Navigation;
namespace SPQuickLaunchAddItemWebPart.VisualWebPart1
{
public partial class VisualWebPart1UserControl : UserControl
{
protected void Page_Load(object sender, EventArgs e)
{
CleanUpQuickLaunch(“My Header”);
AddQuickLaunchItem(“My Header”, “http://www.google.com/q=stuff”, “My Link Here”, “http://www.google.com”);
CleanUpTopNavigationBar(“My Header”);
AddTopNavigationBarItem(“My Header”, “http://www.google.com/q=stuff”, “My Link Here”, “http://www.google.com”);
AddTopNavigationBarItem(“My Header”, “http://www.google.com/q=stuff”, “My Link Here1”, “http://www.google.com”);
}
public static void CleanUpQuickLaunch(string header)
{
using (SPSite site = SPContext.Current.Site)
{
using (SPWeb web = site.OpenWeb())
{
web.AllowUnsafeUpdates = true;
SPNavigationNodeCollection quickLaunch = web.Navigation.QuickLaunch;
// try to get quick launch header
SPNavigationNode nodeHeader = quickLaunch.Cast<SPNavigationNode>().Where(n => n.Title == header).FirstOrDefault();
//if header not found remove it
if (nodeHeader != null)
{
quickLaunch.Delete(nodeHeader);
}
}
}
}
public static void CleanUpTopNavigationBar(string header)
{
using (SPSite site = SPContext.Current.Site)
{
using (SPWeb web = site.OpenWeb())
{
web.AllowUnsafeUpdates = true;
SPNavigationNodeCollection topNavigation = web.Navigation.TopNavigationBar;
// try to get quick launch header
SPNavigationNode nodeHeader = topNavigation.Cast<SPNavigationNode>().Where(n => n.Title == header).FirstOrDefault();
//if header not found remove it
if (nodeHeader != null)
{
topNavigation.Delete(nodeHeader);
}
}
}
}
public static void AddQuickLaunchItem(string header, string headerURL, string item, string url)
{
using (SPSite site = SPContext.Current.Site)
{
using (SPWeb web = site.OpenWeb())
{
web.AllowUnsafeUpdates = true;
SPNavigationNodeCollection quickLaunch = web.Navigation.QuickLaunch;
// try to get quick launch header
SPNavigationNode nodeHeader = quickLaunch.Cast<SPNavigationNode>().Where(n => n.Title == header).FirstOrDefault();
//if header not found create it
if (nodeHeader == null)
nodeHeader = quickLaunch.AddAsFirst(new SPNavigationNode(header, headerURL, true));
nodeHeader.Update();
//try to get node item under header
SPNavigationNode nodeItem = nodeHeader.Children.Cast<SPNavigationNode>().Where(n => n.Title == item).FirstOrDefault();
//If item not found under heading then create it
if (nodeItem == null)
nodeItem = nodeHeader.Children.AddAsLast(new SPNavigationNode(item, url, true));
else
nodeItem.Url = url;
nodeItem.Update();
nodeHeader.Update();
}
}
}
public static void AddTopNavigationBarItem(string header, string headerURL, string item, string url)
{
using (SPSite site = SPContext.Current.Site)
{
using (SPWeb web = site.OpenWeb())
{
web.AllowUnsafeUpdates = true;
SPNavigationNodeCollection topNavBar = web.Navigation.TopNavigationBar;
// try to get quick launch header
SPNavigationNode nodeHeader = topNavBar.Cast<SPNavigationNode>().Where(n => n.Title == header).FirstOrDefault();
//if header not found create it
if (nodeHeader == null)
nodeHeader = topNavBar.AddAsFirst(new SPNavigationNode(header, headerURL, true));
nodeHeader.Update();
//try to get node item under header
SPNavigationNode nodeItem = nodeHeader.Children.Cast<SPNavigationNode>().Where(n => n.Title == item).FirstOrDefault();
//If item not found under heading then create it
if (nodeItem == null)
nodeItem = nodeHeader.Children.AddAsLast(new SPNavigationNode(item, url, true));
else
nodeItem.Url = url;
nodeItem.Update();
nodeHeader.Update();
}
}
}
}
}
Please reference this: http://tablesorter.com/docs/ for the actual source.
Step 1: Add the following to the ASP code:
(Note, you will want to copy the js and css files to a local network server, I am just using the source)
<script type="text/javascript" src="http://tablesorter.com/jquery-latest.js"></script>
<script type="text/javascript" src="http://autobahn.tablesorter.com/jquery.tablesorter.js"></script>
<link rel="stylesheet" href="http://tablesorter.com/themes/blue/style.css" type="text/css" media="print, projection, screen" />
(This will go after the code above, however the first $(document).ready command is fired for the first time the page is rendered. The second one is for if you are using AJAX Update Refresh Panels) If you are not populating the GridView on load, omit the first $(document.ready)
<script type="text/javascript">
try{
Sys.Application.add_init(appl_init);
$(document).ready(function () { $(<%= grdCaseInfo.ClientID %>).tablesorter(); });
}
catch(err){
}
function appl_init() {
try{
var pgRegMgr = Sys.WebForms.PageRequestManager.getInstance();
pgRegMgr.add_endRequest(EndHandler); }
catch(err){
}
}
function EndHandler() {
try{
$(document).ready(function () { $(<%= grdCaseInfo.ClientID %>).tablesorter(); });
}
catch(err){
}
}
</script>
(Please note, the CSS Class "tablesorter" must be used)
<asp:GridView ID="grdCaseInfo" runat="server" EnableModelValidation="True"
class="tablesorter" AutoGenerateColumns="False">
<Columns>
<asp:BoundField DataField="ID" HeaderText="Case" />
<asp:BoundField DataField="CaseTitle" HeaderText="Title" />
</Columns>
</asp:GridView>
(Use what ever code you need)
private string ConnectionString = "Data Source=.;Initial Catalog=CMS_InfoDept;Persist Security Info=True;User ID=cmsuser;Password=pass@word1";
protected void Page_Load(object sender, EventArgs e)
{
BindGridView();
}
private void BindGridView()
{
List<Case> cases = new List<Case>();
using (CMSDataContext db = new CMSDataContext(ConnectionString))
{
var dbResults = from q in db.tblCases
where q.caseOwnerID == 2
select q;
foreach (var dbItem in dbResults)
{
Case caseItem = new Case();
caseItem.ID = dbItem.ID;
caseItem.CaseTitle = dbItem.caseTitle;
cases.Add(caseItem);
}
this.grdCaseInfo.DataSource = cases;
this.grdCaseInfo.DataBind();
}
}
}
(Adding the following code after you perofrm a DataBind() will ensure that your table will have hr that is required by the jQuery)
// This is required for all sorting on this gridview
if (grdCaseInfo.Rows.Count > 0)
{
// This replaces <td> with <th> and adds the scope attribute
grdCaseInfo.UseAccessibleHeader = true;
// This will add the <thead> and <tbody> elements
grdCaseInfo.HeaderRow.TableSection = TableRowSection.TableHeader;
}
Modify Your Quick Launch
First, modify your quick launch:
http://xxxxxxx/_layouts/quiklnch.aspx
Add a javaScript modal popup
Next, get the link of the item you want to add, and make sure it has the IsDlg=1 in the URL, add it as a link in the following format:
javascript:function tdql1(){SP.UI.ModalDialog.showModalDialog({url:’/xxx/Lists/xxx/NewForm.aspx?RootFolder=&IsDlg=1′,title:’Press Publication’})}tdql1();
Here is some sample code on how to capture the enter key on a textbox in ASP.NET. I am posting this because I use it a lot.
function KeyDownHandler() {
if (event.keyCode == 13) {
event.returnValue = false;
event.cancel = true;
document.getElementById(‘cphmainContent_C008_LoginButton’).click();
}
}
Then add this to your textobox:
onkeydown=”KeyDownHandler();”
So the strangest error came up in our environment today.
When users go to open excel documents, they get this message:
Unable to process the request. Wait a few minutes and perform this operation again.

I did a trace in ULSLogViewer:
There was an error in communicating with Excel Calculation Services http://xxxxxx:12345/fc4fbe4d08ge4a5589e844e33e8d3c08/ExcelService*.asmx exception: An error has occurred. [Session: User: domain\yyyyyyy].
This didn’t say a whole lot, so I went to IIS Manager (inetmgr) on the system. I saw the service and the app pool looked like it was up and working fine. However, it still didn’t work.

After performing an “IISRESET”, it worked juts fine.
Microsoft Expressions Blend has some very useful functionality and I just wanted to share this.
Here is the overview for SketchFlow by Microsoft: http://www.microsoft.com/expression/products/sketchflow_overview.aspx
Jeff Rix who works with me created this in about 15 minutes within SketchFlow. It is much better UI prototyping than Excel or Visio.
")
I really suggest this application to anyone who is a BA or Developer.
All,
SCRUM is GREAT with Agile programming, however; sometimes you need to change things up a bit. Sometimes, you have a small enough team that you may need to combine SCRUM with Kanban.
Please see this site for Kanban starting material:
and
Kanban kick-start example – Crisp
As you can see below, we have expanded our use of Kanban and have the “Great Ideas” board…
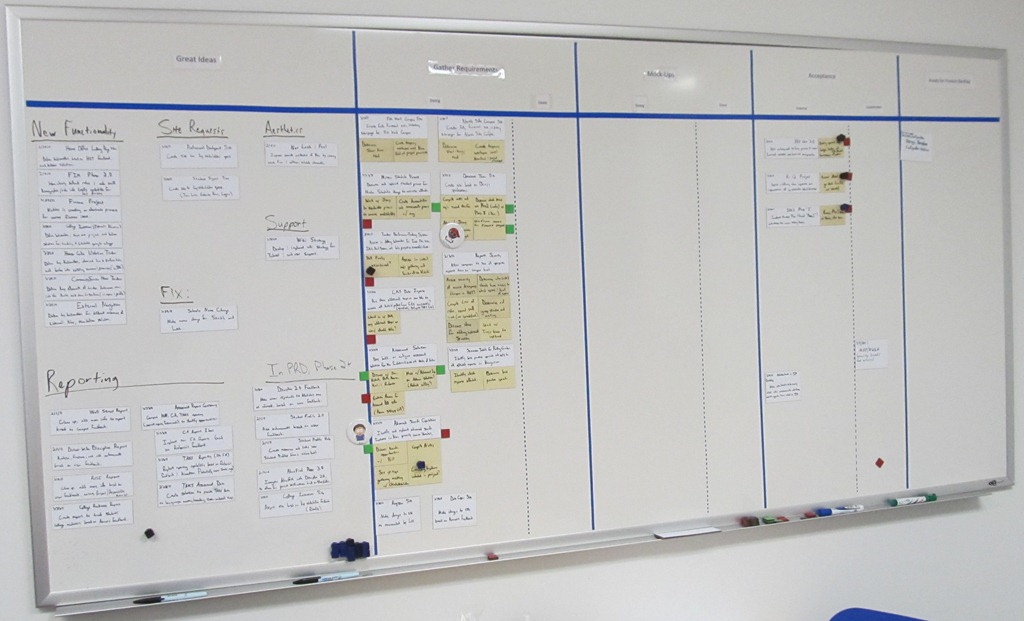
Next we use the Product Backlog as well as the development kanban board…

Taken from the PDF referenced above, see the following examples and rules.

And now the rules…

I get so many folks contacting me asking what do I recommend when storing massive amounts of files in SharePoint. Using SP as a document management tool. As a developer I recommend creating an application that will do this for them. However I know the answer is “We have to use SharePoint” and that’s very true because of all of the built in features.
For this reason, I would like to recommend this approach to everyone:
Now, determine the size requirements for your content DB for now, and the length of your retention schedule in years but no more than 7 years. Add up the length of all of your files, and ensure that you multiply that number by 10 if you have versioning turned on.
Because SharePoint 2010’s recommend content database size should be < 200 GB you might want to consider remote storage by using SQL’s FILESTREAM provider. You will have to get it working and it’s a small chore. Please reference this link to get started: http://technet.microsoft.com/en-us/library/ee748631.aspx
Build an application that will COPY (not move) your files from the old system to the new system. Make sure you throttle the files. Also make sure that you keep a detailed log about every file you COPY over.
It is also a great idea to keep the old system in place and for the life of the retention just in case you find any immediate issues in the future. Maybe create a new DNS name for the legacy file server, but move the DNS to the new system if needed.
That’s my two cents. If When I do something like this, I will blog about it!
In this video I will create a set of cascading drop down fields using two other SharePoint lists. This is a pretty common request, and it is fairly simple task to accomplish.

In this blog posting, I will take you step by step on creating an InfoPath Form that connects to a web service stored on another server (normally causing cross-domain issues).
The business need:
Here is the final result.

Web Service Methods:

I created an ASMX service because I knew for sure that it would be compatible with Microsoft InfoPath for sure. I didn’t want to create a WCF service that did this just to find out it didn’t work with InfoPath.
Rules:

Next, convert all of your web service to a SharePoint connections library. This will deploy all of your connections and allow your InfoPath to use it directly.

Now, you must ensure that cross domain settings are turned to allow in InfoPath Form Services. In Central Admin, go to General Application Settings, then Configure InfoPath Form Services…

Next, turn on Allow for Cross-Domain Access for the User Form Templates, this enables you to use a separate server for the web service.

To enable rules, you will need to right click on one of your controls, then select Rules and Manage Rules…

For the first field, Employee’s Location, you will have to set up rules so once it is selected your InfoPath form performs an action, and that is to:


And by this time your Employee’s drop down should be populated.
I will not take you through the rest of the examples to get to this point, but please let me know if you have questions, I can fill out more to my blog if questions arise.
Bill.
You can export all users to a CSV file from Active Directory using a tool called CSVDE, it comes with Windows Server 2003, 2003 R2, 2008, and 2008 R2. It also comes in the RSAT pack for Windows 7 (shown on my blog post here).
Its really simple,

Now you can import this into excel.
I have several servers thankfully all of them are development servers that have this issue… It happens a lot, and finally instead of creating a new server every time (and I have) I decided to fix the issue. After several hundred hours of debugging, I finally decided to call Microsoft’s Premier Support. It was worth it in its entirety.
Here is what I was getting…
To resolve it do the following things:
Stop the User Profile Synchronization Service
First you have to start SharePoint PowerShell

Type in Get-SPServiceInstance then capture the GUID of the User Profile Synchronization Service as shown below

Now that you have the GUID, type in Stop-SPServiceInstance <GUID> as shown below…

Now your service is stopped…
![]()
…But we are not yet out of the woods… We have a lot left to go…
Open IIS (inetmgr)
Go to:
Click on the server name and select Authentication
Click on your server host name, then double click Authentication

Selected Anonymous Authentication then choose Edit
Click on Anonymous Authentication then click Edit…

Click the specific user, then enter “IUSR”
Add IUSR to the specific user account

Add the service account to Local Admin group on the server
Go to:

Add the service account to your computer

Click “OK” then keep the Computer Management window open
Add the service account to all the FIM groups
Do the exact same to all of the FIM groups as you did above

Add the service account to the WSS_WSP and WSS_Admin_WPG group
Again, do the same as you did above but for all the WSS_WSP and WSS_Admin_WPG groups

Perform an IISRESET
Go to:
Create a new User Profile Synchronization Service Application


Add the following fields (I added 2 to any of the database table names as shown below)

Click Create
Perform an IISReset
Make sure you can get to this new application with out errors. It is very important that you can access this and that you know you can at this point. If you can not, then you will have to do further trouble shooting…

Note: If still unable to get to the User Profile Application…
If you are still unable to get to the User Profile Application service, you will want to check one more thing. That is to ensure that your WCF services are still running in IIS Manager, you will need to make sure the site has been started

Perform another IISReset then try again.
Open ULS Log Viewer to get ready…
At this point in time, you will want to be ready to start tracing the User Profiles logs…
In ULS Log Viewer, right click on the log area and choose Filter by Item. Then choose Category and type in “User Profiles”. This will allow you to filter out only what you need at this point.

Started the User Profile Synchronization Service
Now you must restart your service with the new user profile synchronization service application that you just created.


And if you did everything correctly then you should see everything running as it needs to be:

Don’t forget to configure your MySite information in the new User Profile Service Application you created. You will need to re-run all of your profile synchronization.
Let me know if this has helped you!
Bill
All I can say is WOW. If something as simple as the PeopleEditor takes me a week to implement and that is with having two Microsoft Premier Support cases open on it, than once I figure it out its worth writing an article on it.
See the example below of what it should look like once it is finished.


Solution: Add the following line to the control’s front end source above the ScriptManger
<script type="text/javascript" src="/_layouts/entityeditor.js"></script>

Solution: Add the following line to the control’s front end source above the ScriptManger
<script type="text/javascript" src="/_layouts/entityeditor.js"></script>

Solution: The solution for this is much more complicated, I will quickly try to explain what the problem is and how to resolve it.
First you have to understand that you can’t just add the PeopleEditor control to your GridView in the WYSIWYG editor, in fact, its not even in the tool box. You must instead add it in code behind on each row that exists.
When you start out with an empty grid, then populate it within in runtime, you will notice there are some missing javascript functions that the gridview uses. So you must first some how find a way to get those functions in the page when it renders. But there is only one path that I have found that allows you to do it. I have layed it out in VISIO so you can see what it looks like.

This solved my issue with this, and here is the samples. If anyone wants a copy of my solution, please enter a post on it with your email, and I would be happy to send it to you.


Bill.

If you want SharePoint 2010 to open the PDF file from within Internet Explorer, follow the instructions below:
From Central Administration, go to Manage Web Application under Application Management…

Select your web site, then choose General Settings, and again General Settings…

Select the browser file handling to Permissive.

Now you can open PDF’s in your browser, even after hitting F5 to refresh, I had to hit Control + F5 to hard refresh to get it all to work.
I ran across a great blog that shows how to do some pretty cool stuff with the Drop Down within gridviews.
protected void dropdownlist1_SelectedIndexChanged(object sender, EventArgs e) {
// get reference to the row
GridViewRow gvr = (GridViewRow)(((Control)sender).NamingContainer);
// Get the reference of this DropDownlist
DropDownList dropdownlist1 = (DropDownList) gvr.FindControl("dropdownlist1");
// Get the reference of other DropDownlist in the same row.
DropDownList ddlParagraph = (DropDownList) gvr.FindControl("ddlParagraph");
}
Bill
I have been getting the following error for only some users, and on some pages that has a web part that I created that checks for their username information.
403 Forbidden – The website declined to show this page, most likely cause, this website requires you to log in
Yes, I tried logging out and logging back in. I have tried everything….
Here is my code:
SPSecurity.RunWithElevatedPrivileges(delegate()
{Microsoft.SharePoint.SPSite site = Microsoft.SharePoint.SPContext.Current.Site;
Microsoft.SharePoint.SPServiceContext context = Microsoft.SharePoint.SPServiceContext.GetContext(site);
// Uses the profile manager that was set up in Central Admin
Microsoft.Office.Server.UserProfiles.UserProfileManager profileManager = new Microsoft.Office.Server.UserProfiles.UserProfileManager(context);if (impersonate.Length == 0)
{
// Used this, but there is no difference: staffMember = SPContext.Current.Web.CurrentUser.LoginName.ToString();
// Used this, but there is no difference: staffMember = System.Web.HttpContext.Current.Request.ServerVariables["AUTH_USER"];
staffMember = HttpContext.Current.User.Identity.Name;
}
else
{
staffMember = impersonate;
}
});
Regardless of the different combinations I tried, I got this error only for some users, and only on some of the pages. So far my trend has only been the web part I created with this code. If I bypass that code (and I have a query string that allows me to impersonate a user) it will work just fine
Here is the error:

So after about 8 hours of troubleshooting, I finally figured out it would work just fine if I added that user that was having issues to the Administrators Group on the local SharePoint server after performing an IISReset.
So, after playing around a bit more I added “NT Authority\Network” (a local account) as a local admin instead of the user that was having a problem, performed an IISReset, and it worked as it should now for that user and all of the affected users.

I am waiting to hear back from Microsoft to see if this is a recommended solution to the issue, or if there is a better practice solution that I should be following.
I will keep this post updated.
To show a dialog in SharePoint 2010 simply call the OpenPopUpPage() method with the URL as the parameter. This will look something like this…
<a href="javascript:OpenPopUpPage(‘/pages/test.aspx’);">Show this page…</a>

NOTE: Be sure to specify the CSSClass “sp-notdlg” in anything that comes up that shouldn’t be coming up in your master page. My modified ribbon toolbar came up for me, but it was able to suppress it in dialogs by adding the sp-notdlg tag to its css class attributes.
Happy New Year!
Check this site out…
It automatically creates your regular expressions that you like.
http://www.txt2re.com/index-csharp.php3

Okay, so developing a UI is fun, especially when there is some challenges to it.
The standard GridView is a very useful dynamic HTML table builder for your data, it can do a lot of different things. But it is very limited!
For example, if you were to create list that had multiple rows of data, and you wanted to group them by a category, you can’t… …unless that is you add some code.
I took about 3 full days trying to come up with different ways that I can get this done, but I was finally able to figure it out.

Now, because I find it better practice, I always find it better to bind the data from the code-behind, rather than pulling in a database directly using the DataSourceObject from the UI. This makes your application more expandable.
Example:
Sorry, the examples are in images mostly, I will try to format the code so that I can paste it in this form. But this example I find it important to show where the code should be pasted.
First, make a private list of a string, i called it ItemsToExpand, then initiate it.

Next, you will want to save the state of the items expand, and recall them if they contain any values…

Before saving the values, you will want to check if it is a postback, and if so, get the values from the EventArguments var that is passed back from the JavaScript client side.

Sort the list, set the data source to the DataGrid, then save the state of the ViewState “ItemsToExpand”

Here is what I used to sort the list…

Here is the code to create the columns and does all of the magic..
protected override void Render(HtmlTextWriter writer)
{
Table table = (Table)this.GridView1.Controls[0];
string lastCategory = string.Empty;
foreach (GridViewRow row in GridView1.Rows)
{
int realIndex = table.Rows.GetRowIndex(row);
string currentCategory = this.GridView1.DataKeys[row.RowIndex].Values[0].ToString();
if (currentCategory != lastCategory)
{
GridViewRow groupHeaderRow =
new GridViewRow(realIndex, realIndex, DataControlRowType.Separator,
DataControlRowState.Normal);
TableCell newCell = new TableCell();
newCell.ColumnSpan = this.GridView1.Columns.Count; // <— Is not working…
newCell.BackColor = System.Drawing.Color.FromArgb(233, 229, 229);
newCell.ForeColor = System.Drawing.Color.DarkGray;
newCell.Font.Bold = true;
newCell.ColumnSpan = 4;
bool itemFound = false;
foreach (string item in this.ItemsToExpand)
{
if (item.Trim() == currentCategory.Trim())
{
itemFound = true;
break;
}
}
string image = string.Empty;
if (itemFound)
{
image = "<img src=\"http:\\\\csapp2\\Discipline\\images\\nav_minus.gif\""
+ " style=\"cursor:hand;\" onMouseUp=\"__doPostBack(‘__Page’, ‘Show|"
+ currentCategory + "’);\"> ";
}
else
{
image = "<img src=\"http:\\\\csapp2\\Discipline\\images\\nav_plus.gif\""
+ " style=\"cursor:hand;\" onMouseUp=\"__doPostBack(‘__Page’, ‘Show|"
+ currentCategory + "’);\"> ";
}
newCell.Text = image + this.GridView1.DataKeys[row.RowIndex].Values[1].ToString();
groupHeaderRow.Cells.Add(newCell);
table.Controls.AddAt(realIndex, groupHeaderRow);
lastCategory = currentCategory;
}
}
base.Render(writer);
}
Now, create a RowDataBound Event, and use the example code…

You can have multiple data key names, I used two of them in the aspx code.

Hope this helps!
Bill
This article explains how to have your SQL Server Reporting Service cache the report results.
http://msdn.microsoft.com/en-us/library/bb283188.aspx
I didn’t even know this was possible until I thought to myself how great it would be to see SSRS cache reports that run just a bit longer than normal.
Here are the easy steps to do it.
First, go to your reports application in your server…

Next select the reporting solution.

Now click on the dropdown to show the context menu, click Manage

Next click on the Processing Options:

Finally, set up the cache settings as you wish, I usually set the cache settings to every 30 minutes, this makes a huge difference.

There is a national users group meeting event monthly, and they asked if i could speak at it. Here is a copy of the live meeting video from the SharePoint user group.
I showed the old SharePoint site, and the New.
Okay, first, I wanted to say a few things.
As you can tell from the above statements, that I have some experience things going wrong. I have lost my temper so many times regarding people hard coding their connection string in the source code because it often contains passwords and the passwords are linked to so many other areas. This is even bad if you have a source control system where once you change and remove the password from your code and do it the right way, it will still be in older versions of your code.
You can use .NET Reflector to decompile source code, and here is a sample of what it looks like:

I wanted to show you the right way to do this.
First navigate to your web config file…
C:\inetpub\wwwroot\wss\VirtualDirectories\<sp site name:port name>

Add your configurationstring in your appSettings location under its own key/value pair:

Add the following to your code to get connectionstring.
string connectionString = GetConnectoinString("YourDataConnectionStringKeyName");
private string GetConnectoinString(string key)
{
string connectionString = string.Empty;SPSite site = SPContext.Current.Site;
System.Configuration.Configuration
config = WebConfigurationManager.OpenWebConfiguration("/", site.WebApplication.Name);
AppSettingsSection appSettings = config.AppSettings;connectionString = appSettings.Settings[key].Value;
return connectionString;
}
Additional security measures you can take is to encrypt your connection string, however I don’t really see the point because if a programmer wants your connectionstring they will get it via a unit test, or a breakpoint. So if you don’t want your connection string to become parent to the programmers, you will want to use a different username password in the production environment, and only the person who should know the password should also have exclusive access to the SP Server.
Hope this helps. I really am not a mean guy as I may have sounded above, however this is one of my major pet peeves.
Bill
Here is some code that I find myself using in all of my web parts. You are also free to use it. I simply reuse it in all of my web parts.
It returns “DOMAIN\\USERNAME”
private string GetUserAccount()
{
// Normally used with all web parts
// By: Bill Daugherty II
// Date Modified: 08/15/2010string impersonate = string.Empty;
try
{
if (Request.QueryString["impersonate"].Length > 0) impersonate = Request.QueryString["impersonate"];
if (Request.QueryString["i"].Length > 0) impersonate = Request.QueryString["i"];
}
catch
{}
string staffMember = string.Empty;// Gets the staff SAM account
SPSite site = SPContext.Current.Site;SPServiceContext context = SPServiceContext.GetContext(site);
// Uses the profile manager that was set up in Central Admin
UserProfileManager profileManager = new UserProfileManager(context);if (impersonate.Length == 0)
{
// staffMember = SPContext.Current.Web.CurrentUser.LoginName.ToString();
staffMember = HttpContext.Current.Request.ServerVariables["AUTH_USER"];
}
else
{
staffMember = impersonate;
}return staffMember;
}
If you find that you use this also, please just add a comment.
Bill
When setting up a test site (one of our many) before we set up our production environment, I have come across this lovely error:
An error has occurred in the claim providers configured from this site collection

When I went to create the MySite, I scrolled down a bit to the Read Permission Level configuration and found the users were not being found.

So when I click on the “Browse” icon, I get this wonderful message…

So, here is how I resolved the issue. For what ever reason, my machine name was longer than the NetBIOS recommends (I have learned my lesions, don’t worry), and so the access mappings were not showing the full name of my machine (http://cssp01-testphase1:<port>/). so I found out that this is simply why the error is occurring.

Tada!!! — No errors…

So, this is how I decided to spend half of one of my days off. Isn’t this sad? I am addicted to development.
I created a new voting web part that will allow users to vote once, and it will add a cookie to the users computer that will expire in 14 days, or until a new question comes around.
It allows the user to use more than one list to store your question allowing for multiple concurrent polls at once.
I first tried to download and install: http://pollingwebpart.codeplex.com/ however I could not get it to work with SharePoint 2010 even after I made the configuration changes. I decided to create my own at this point.
The project will be stored here: http://pollwebpart.codeplex.com. I will upload it shortly.
Here are the screenshots:
Before Vote (supports up to 70 questions):

After Vote (Only shows the answered questions)

And here is the configuration… You just enter the name of the list. The list will be stored at the root site.

And here you can add items to the list. The poll only shows the last item in the list.

This site is to act as a “code repository” for all of my source code that I use quite frequently.
Here is a great reference from Microsoft regarding some of the SharePoint development tools:
When building SharePoint 2010 web parts, I have stumbled across the fact that there are really no easy ways to add a configuration file such as a web.config or an app.config. So I decided to add a new project to my solution that I will eventually detach. I expect it to build as a .DLL file and I can package it up with all of my solutions. It will contain my connection string (with no passwords of course), also URL’s etc…
I hope to find a better way of doing this, but for now I think this is really the way to go. You can eventually swap out .DLL’s for use when testing, or switching environments.

Additionally, here is another way. You can add the configuration to the root SharePoint site’s web.config file. Reference this link for further instructions.
If you come up with any better ways, I would like to hear about them. For now, this is the safest way and most secure way.
When using SilverLight 4.0 along with WCF, many are often trying to figure out why you are getting an error as such:
An error occurred while trying to make a request to URI ‘http://localhost:8732/Design_Time_Addresses/MyService/Service1/'</a>. This could be due to attempting to access a service in a cross-domain way without a proper cross-domain policy in place, or a policy that is unsuitable for SOAP services. You may need to contact the owner of the service to publish a cross-domain policy file and to ensure it allows SOAP-related HTTP headers to be sent. This error may also be caused by using internal types in the web service proxy without using the InternalsVisibleToAttribute attribute. Please see the inner exception for more details.
Well, for me, I got that error, but I was able to resolve it rather quickly.
If you are like me, you will create your solution including a Web Service Layer (WCF), a Data Access Layer, Presentation Layer (SilverLight), and even more layers…
…To put it simple, you can’t call your WCF Service unless it is deployed to an IIS Server because you must have a "Cross Domain Policy” in place. And to add a cross domain policy you must add a file to your IIS Root path.
So in short, as far as I can tell, you can’t debug your WCF service and your SilverLight application very well. So this is where writing a bunch of unit tests will come in very well with your web service.
I hope that I have explained the problem and the solution well enough above, below I will take you trough a small walk through below so you can see how I was able to accomplish the task as described above.
Create a whole new solution in Visual Studio 2010. Select SilverLight, SilverLight Application, and provide a name. Then select OK.

The next part is up to you, we simply have no need to have a separate host for the SilverLight application. But if you would like one created, you are more than welcome to at this point. For my demo, I will not, I will deselect it, ensure I have SilverLight 4 selected, then click OK.

Add a new project to your solution.

Select WCF, and WCF Service Library, I called my project MyService, select OK

Rename your IService1 to something else by refactoring it. You can do so with F2, or you can do a Control+H (I usually end up going this route)

If you did the F2 route (The refactoring route), you can select the new name, add search in comments, and click OK.

Check out your changes, then click Apply

Create your first Operation Contract as shown below…

Be sure to change your web service and interface file names.

Repeat the refactoring for the service application as well…


Important Step: Be sure to change wsHttpBinding to basicHttpBinding in your app.config file. This step is 100% required because SilverLight does not allow any other type of binding.


Next add a few controls as shown below to your WCF application

Double click your Call Service button to access the code behind

Add the following code…

Important Step: This step is the step that requires your WCF application to be hosted when building your SilverLight application.
Create a directory in your wwwroot folder as I did below…
C:\INETPUB\WWWROOT\wcfhost

In the WCFHOST directory create two new XML files as shown below…
clientaccesspolicy.xml
<?xml version="1.0" encoding="utf-8" ?>
<access-policy>
<cross-domain-access>
<policy>
<allow-from http-request-headers="*">
<domain uri="*"/>
</allow-from>
<grant-to>
<resource path="/" include-subpaths="true"/>
</grant-to>
</policy>
</cross-domain-access>
</access-policy>
crossdomain.xml
<?xml version="1.0"?>
<!DOCTYPE cross-domain-policy SYSTEM "http://www.macromedia.com/xml/dtds/cross-domain-policy.dtd"</a>
<cross-domain-policy>
<allow-http-request-headers-from domain="*" headers="*"/>
</cross-domain-policy>
In IIS create a new web site calling it wcfhost as shown below… I did this so that I can use port 88 as SharePoint happens to be installed on my 80 port.

You will see the new site as shown below…

Now its time to deploy your new web service… Right click on MyService and click Publish…

Select your new web service site, then click publish.

Back in IIS, select your new web site and then refresh

Right click on your new MyService then select “Convert to Application”, this will enable it to run as an application

Be sure the application pool for the wcfhost site is actually .NET Framework 4.0. This by default is 2.0, and it will not work.

Now test your WCF web service application…

Now right click on Service References in your SilverLight application, select Add Service Reference…

Select your new service location URL, then click GO to select your service, enter a namespace as shown below, then click OK

Hit F5 to run the SilverLight application, once you do this, you will be presented with this wonderful dialog. Well, the web service is not hosted within the project, but it is now hosted, so even though the message box below does indicate it will not work, it will… …Click Yes…

Enter your name, then click Call Service, cross your fingers…

And hopefully you will be presented with a dialog box as you indicated with the code above to show when it gets a string from the web service.

I hope this posting helped if you found it from your favorite search engine.
To Deploy a WSP solution to SharePoint 2010 follow the simple steps below:
Set up your path in your environmental table…
SET PATH=%PATH%;C:\Program Files\Common Files\Microsoft Shared\web server extensions\14\BIN
Locate Your DEBUG or RELEASE folder
CD\DEPLOY
Add your solution
stsadm -o addsolution -filename YESPrep_Redirection.wsp
Deploy your solution
stsadm -o deploysolution -name YESPrep_Redirection.wsp -url http://nav-test.yesprep.local -allowgacdeployment -immediate
pause
——————
To Remove it before deploying another solution follow the steps below:
Set up your path in your environmental table…
SET PATH=%PATH%;C:\Program Files\Common Files\Microsoft Shared\web server extensions\14\BIN
Locate Your DEBUG or RELEASE folder
CD\DEPLOY
Remove your solution
stsadm -o retractsolution -name YESPrep_Redirection.wsp -URL http://cssp02-staging -immediate
Remove your solution
stsadm -o deletesolution -name YESPrep_Redirection.wsp
Lastly make sure that you add the web part into the gallery (upload the *.webpart file)
All,
I just wanted to let the viewers of this blog know that our migration to SharePoint 2010’s second of three milestones have become a huge success. I was able to implement MySite and it has become a huge success. I will keep notes on here to see how the progress goes.
Bill.
After SharePoint 2007 SP2 it is easy to make a SharePoint site Read Only.
Simple go to the Content Database that you want to make read only, and right click it, go to Properties…

Under Options, select True for the Database Read Only attribute…

Select Yes…

Your Content DB is now "Read Only"

Here are before and after pictures of SharePoint, in my case it was our "MySite"
Before…

After…

Here is some information from Microsoft:
I am going to re-use it in our organization to help promote the new MySites.

As part of our migration plan, I would like to move just our MySite first.
By doing this first, this will allow users to still reach their MySite as the rest of the intranet is down for several hours or days.
In addition we have been really promoting our MySite’s, so we don’t want our users to be with out their shared and private data including documents while we are in this migration transition.
We will also move our a record of “navigation.yesprep.local” to temporary intranet site to show the status of the upgrade. It will also provide a link to their MySite.
I wanted to be able to do this days/weeks before we do the final full migration.
I have fully configured MySite in SharePoint 2010 with everything it needs to be fully functional.
In our test SP 2007 environment I decided to test and make sure we can make the default mysite in 07 point to 2010. And with much doubt from other SharePoint guru’s, it worked!
Here is what I did to make it work.
In the Shared Services in Central Administration, i went to My Site Settings…

I pointed the Personal Site Provider to my staging/test My Site, I also added the dynamically created site based on my settings in my SharePoint 2010 environment…

IMPORTANT: Be sure that you select “Enable My Site to support global deployments,” otherwise this simply will not work, and you will get an error message saying that this didn’t work and you won’t have any indication as to what didn’t work…

To test it, go to the SharePoint 2010’s home page, and click “My Site”

Your new MySite should now point to SharePoint 2010!!!

We are getting close to that point where we will turn down the old SharePoint site and bring up the new.
I found this from Microsoft: http://technet.microsoft.com/en-us/library/ff607537.aspx. It is a checklist to go over what is needed and required to upgrade.
Pre-upgrade steps for a database attach upgrade
Prepare for upgrade
[ ] Run the pre-upgrade checker
[ ] Create an inventory of server-side customizations in the environment
[ ] Clean up your environment
Prepare the new environment
[ ] Install and configure SharePoint Foundation 2010 and any language packs
[ ] Configure general farm settings
[ ] Create and configure Web applications
[ ] Reapply server-side customizations
[ ] Verify the new environment
[ ] Run the pre-upgrade checker
[ ] Set the previous version databases to be read-only (database attach with read-only databases)
[ ] Back up databases
[ ] Detach the previous version databases (standard database attach)
[ ] Restore a backup copy of the database (database attach with read-only databases)
[ ] Verify custom components
[ ] Verify permissions
[ ] Attach a content database to a Web application
[ ] Verify upgrade for the first database
[ ] Attach remaining databases
[ ] Monitor upgrade progress
[ ] Verify upgrade for the remaining database
Post upgrade steps for database attach upgrade
[ ] Verify upgrade and review upgraded sites
Additional Steps I like to add…
[ ] Add My Site
[ ] Update Old/Missing Web Parts
When adding SSRS Reports to SharePoint 2010 using the new Performance Point Services Report Viewer Web Part, do the following…
Under Site Actions, select More Options…

Select Performance Point Content Lists

Select “Add new item”…

That will load up a “Click Once” application that will show Performance Point Dashboard Designer…
Click the Create Tab…

Type in the Server Name, then click Browse….

Select the report that you have selected…

Select Preview…

Select the Properties tab, then give your report a name by entering the name in the name field…

(I did not fill anything else out)
Click the Save in the toolbar…

Refresh your browser, and you should see your report in this list…

Go to the page where you wish to add your report, then click Edit…

This is optional, but i wanted to switch the column to a single column…

Add a new web part, select Performance Point, Performance Point Report, then click Add…

Click “Click here to open the toll pane.”

Click on the List icon…

Select the report from the list you want to add, click OK…

And you should have the report displayed that you would like to see….

Okay, so I just wanted to say that I upgraded our My Site into our staging environment to test and to see how it will work. I will say it worked out well.

This worked out well. I just combined the two items that I blogged about before:
Except this time I did not preserve the theme.
stsadm -o addcontentdb -url http://my-test.yesprep.local -databasename SharepointMySitesContent -databaseserver cssql03-staging -preserveolduserexperience false

Worked great!
Changing the look of your top menu navigation bar is rather simple. I will demonstrate here how to accomplish this.
Here is the example below…

In SharePoint Designer 2010, and your site open, go to All Files, then Style Library

From File, create a new CSS file calling it Style…

Open the file style.css that you just created…

Apply the following:
/* Non text menu */
.s4-tn{
padding:0px;
margin:0px;
background-color:#B0C5FF;
color:navy;
}
.s4-tn ul.static{
white-space:nowrap;
}
/* Top Menu */
.s4-tn li.static > .menu-item{
/* [ReplaceColor(themeColor:"Dark2")] */ color:#3b4f65;
white-space:nowrap;
border:1px solid transparent;
padding:4px 10px;
display:inline-block;
height:15px;
vertical-align:middle;
background-color:#B0C5FF;
color:navy;
}
/* Border around the menu sub items */
.s4-tn ul.dynamic{
/* [ReplaceColor(themeColor:"Light2")] */ background-color:white;
/* [ReplaceColor(themeColor:"Dark2-Lighter")] */ border:1px solid #003399;
}
/* Actual Menu Item */
.s4-tn li.dynamic > .menu-item{
display:block;
padding:4px 10px;
white-space:nowrap;
font-weight:normal;
background-color:#B0C5FF;
width:200px;
color:navy;
}
/* Menu Item Hover Over */
.s4-tn li.dynamic > a:hover{
font-weight:normal;
color:navy;
/* [ReplaceColor(themeColor:"Light2-Lighter")] */ background-color:#D9D9D9;
}
/* Hover over top menu */
.s4-tn li.static > a:hover
{
/* [ReplaceColor(themeColor:"Accent1")] */ color:#44aff6;
text-decoration:underline;
color:navy;
}
/* hide arrows for top level items with flyouts */
.menu-horizontal a.dynamic-children span.additional-background,
.menu-horizontal span.dynamic-children span.additional-background{
padding-right:0px;
background-image:none;
}
Within your active master page, make the following change: Remove “sitename”
<SharePoint:CssRegistration name="/Style Library/sitename/style.css" After="corev4.css" runat="server"/>
To
<SharePoint:CssRegistration name="/Style Library/style.css" After="corev4.css" runat="server"/>

The web part headers out of the box are very boring and add a lot of white space.
I wanted to show you how to fix that. I created a gradient image in Adobe Photoshop (2 minute project):
Here is the image in case you wanted it: ![]()
I saved the file to a location that everyone will be able to access at least in read only mode.
Then I wanted to apply it to the headers for all of my web parts (if they are something other than a hidden web part):
.ms-WPHeader{
/* [ReplaceColor(themeColor:"Light1")] */ /* background-color:#FFFFFF; */
background:url("/_catalogs/masterpage/en-us/Preview Images/YESLogo/TitleBarBack.png"); /* ***Added: 06-14-2010 *** */
}
.ms-WPHeader .ms-wpTdSpace{
width:5px;
border-bottom:1px solid transparent;
background:url("/_catalogs/masterpage/en-us/Preview Images/YESLogo/TitleBarBack.png"); /* ***Added: 06-14-2010 *** */
}
.ms-WPHeaderTdMenu{
width:20px; /* ***Changed: 06-14-2010 *** Removed old value from 21px; to 20px; */
cursor:pointer;
word-wrap:normal;
white-space:nowrap;
border:0px solid transparent;
}
Here is the end result

For those of you who are getting errors in SharePoint and can’t figure out what is going on and how to troubleshoot them?
To the SharePoint Administrator and Developer they are pretty worthless errors. So I wanted to show you how to further troubleshoot them.
You will see the following screens as such:

Or the message might show up like this:

You have two options that can be used in combination if you wanted.
ULS Viewer
1. Download the ULS Viewer from Microsoft Code
2. Open the ULS Viewer application
3. Go to File then Open From select ULS 
4. Select the file that you wish to open, in my case I wanted a UNC Path folder 
5. From the toolbar, unselect all of the warning types except for Critical/Error 
6. Have the user duplicate the error once again, make sure you get the new GUID from them
7. Right click on the GUID once you found it in the list below and select “Filter By This Item” 
8. Select Correlation, and ensure the GUID is entered in there: 
9. Now you should have enough to work with. Ensure that you are not looking at the message, but that you are looking at the stack trace 
If the error was recent enough, you can go back in time and look at the specific log file by going to File Open From >> File

Open the file when the error occurred

Select Filter from the toolbar

Type in the first part of the GUID select OK

And you should have details about that log.

Another great feature is the Correlation Tree Button. This allows you to view the unique Names or Correlation ID’s

Alternately you can go into the web configuration file C:\\INETPUB\\WWWROOT\WSS\\VIRTUAL DIRECTORIES\\80\\web.config and find the string:
<SafeMode MaxControls="200" CallStack="false" DirectFileDependencies="10" TotalFileDependencies="50" AllowPageLevelTrace="false">
Modify it to show:
<SafeMode MaxControls="200" CallStack="true" DirectFileDependencies="10" TotalFileDependencies="50" AllowPageLevelTrace="false">
Also find the string:
<customErrors mode="Off" />
Modify it to show:
<customErrors mode="On" />
The last part is okay to use, however it is not as elegant. I will use it in our Staging/Testing/Development environment to save time from looking at the ULS Logs (unless I have the logger running), however I will not enable it in the production.
In this entry, I wanted to show you how we decided to upgrade our SharePoint environment. As you can tell this is something that you should carefully plan out.
I would like to point out a few links to read up on while planning out your migration:
http://technet.microsoft.com/en-us/sharepoint/ee517214.aspx
http://msdn.microsoft.com/en-us/sharepoint/ee514557.aspx
http://blogs.technet.com/b/tothesharepoint/archive/2009/11/10/3292072.aspx
We decided to take a hybrid approach that is not really even listed in any of the above links:
1. Make a backup of all the content databases in production SharePoint’s SQL Server(s)
2. We create a new virtual (Hyper V) machine of SQL Server 2008 R2 (our server name so that you can follow below is called “CSSQL03-STAGING”)
3. We create a new virtual (Hyper V) machine of SharePoint 2010 Enterprise pointing it to the newly created SQL Server (our server is called “CSSP02-STAGING”)
4. We restored the content databases from step 1 into the newly created server
5. Removed the new default content database
6. Add the recently restored content databases in SharePoint
7. Make a backup of the content databases and restore them into a production environment once you are ready.
(All of this will have to be done while your site is in a read only mode)
I will assume you will get through the first portion of this (if not, I will blog further about that).
So, when I went to this step, I removed the old content database, then went to add the new one….


However when I went to add the new one, I go this message:
This content database requires upgrade and could not be attached in this operation. Use either the [stsadm -o addcontentdb] command or [Mount-SPContentDatabase] cmdlet instead.
There was very little (as in no) documentation anywhere showing how to resolve this with the command that it gave me. So I figured I would just wing it…
Under Command Prompt (with elevated permission) navigate to the SharePoint hive directory…
cd "\Program Files\Common Files\Microsoft Shared\Web Server Extensions\14\BIN
Enter the following command in (changing your database name and new SharePoint website’s URL to the new one…
stsadm -o addcontentdb -url http://cssp02-staging -databasename sharepoint.navigation.content -databaseserver cssql03-staging -preserveolduserexperience true

In my case, I had to add a few more content databases, so I just re-ran the same command but changed the content databases each time for all the different content databases.
Test your site, and it should work!
(old site)

(new site)

Next steps are you will have to go through and remove all absolute URL’s and replace them with relative URL’s.
You will have to also create y our MySite as I show you how in another blog, then perform the same action with that. I have not done this part yet however, but if I do find any differences there, I will blog about that as it happens.
Now when users are able to start moving their site to the new look, all they have to do will be to go to the SharePoint site and under Site Actions, point to Visual Upgrade

WARNING: This may cause issues that are difficult to recover from, so be sure you can roll back. In my case I use Hyper-V and snapshots a lot for this scenario mostly so that I can apply the previous snapshot instance. Also use Preview just in case first

When creating an environment for SharePoint 2007 for testing I had found a lot of messy documentation out there. The real point is that I was unable to find great and through documentation.
Here is my situation.
· I have about 3 sites in SharePoint 2007 that I require to be moved into a testing/staging environment.
Here are the steps that I took.
First, backup all of
In the SQL Server (my server is called cssql02-staging), restore all of the content databases.
Right click on Database in SSMS, click Restore Database

Enter the name of the database name…

Select From Device, then click the ellipse button.

Click Add…

Locate the database you backed up, and click OK

Select OK

Select the database backup, and click OK

Click OK after your database was restored

In the production Central Administration, select Application Management >> Content Databases

Take note of the web applications you have, and the different database names (aka content db’s)

Back in your new staging/test server, and under Applicaton Management, select Create or Extend Web Application

Choose Create a new Web Application

Enter the name of the web site as you would have seen it in the production server, but don’t enter a host header unless you created an a-record already in DNS.

Enter your application pool information, use your service account.

Select to restart IIS

Select OK

You should see the Application Created screen, don’t create a site collection at this point.

Under Central Administration, select Application Management, and Content Databases

Select the new web application you created, then select WSS_Content

Next, you will want to take this database off line, and remove the content DB, select OK after you made these changes…

Now that you do not have any content databases, you can select to Add a content database

Recall and Take note of what you had in your production server…

Also, it’s a good idea to have SSMS open so you can ensure the names of the databases are going to be correct for the next step.

When you add the content database, you can reuse an existing database (this is the trick). Enter the first database you restored that is in the application list above…

Select OK

Once you add all of your databases to your application, then you should be all set. You will be able to test your site.

You are done!
Again, not really a SharePoint topic, however more of a developer topic.
When building WCF web services, you will want to be sure that you allow enough concurrent connections. The default concurrent connections to your WCF web service is 10.
When you think about it, you may have 3 or 4 calls when the client application loads, and another 3 or 4 calls when the program is interacting with the web service. This becomes an issue quite quickly. The GC’s in the client application may not release the web service in time for the next calls, and more importantly the web service is a service, so the whole idea is to have many clients concurrently call the web service.
Below, I replaced my application name from “CMS” to “<appname>”, so be sure to replace that, but this will go in the <configuration> section of your web.config file. Everything highlighted in yellow is items you may want to just swap your existing values for. Once this is done you will want to perform an IISRESET as sometimes just changing the web.config may not be enough. (because existing connections)
<system.serviceModel>
<bindings>
<wsHttpBinding>
<binding name="NewBinding0" closeTimeout="23:59:00" openTimeout="23:59:00"
receiveTimeout="23:59:00" sendTimeout="00:10:00" maxReceivedMessageSize="2147483647">
<readerQuotas maxStringContentLength="2147483647" maxArrayLength="2147483647" />
<reliableSession inactivityTimeout="23:59:00" />
</binding>
</wsHttpBinding>
</bindings>
<services>
<service behaviorConfiguration="<appname>.Service.ServiceBehavior"
name="<appname>.Service.Service">
<endpoint address="" binding="wsHttpBinding" bindingConfiguration="NewBinding0"
contract="<appname>.Service.IService">
<identity>
<dns value="localhost" />
</identity>
</endpoint>
<endpoint address="mex" binding="mexHttpBinding" contract="IMetadataExchange" />
</service>
</services>
<behaviors>
<serviceBehaviors>
<behavior name="CMS.Service.ServiceBehavior">
<serviceThrottling maxConcurrentCalls="10000" maxConcurrentSessions="10000" maxConcurrentInstances="10000"/>
<serviceMetadata httpGetEnabled="true" />
<serviceDebug includeExceptionDetailInFaults="true" />
</behavior>
</serviceBehaviors>
</behaviors>
</system.serviceModel>
As you can see from the first image below, the out of the box scrolling functionality is somewhat limited, it keeps the ribbon (and possible titles above the scroll bar). My organization requires that I expand this scroll bar to the full height of the screen because all of our staff for the most part spends their time looking at SharePoint with lower to middle resolution laptops screens. So the bottom line is real estate is really important, and we don’t need the ribbon to be static.

In the v4 master page (or any v4 master page including any of the starter pages you may have downloaded) do the following:
1. Remove the tag “_fV4UI” variable all together from the javascript in the header…. In this case you can remove the whole script if that is all that is in there… 
2. Remove the scroll attribute in the body tag… 
3. Change the name of the s4-workspace, in my case, I just added “-custom” to the ID. 
4. Locate the body CSS rule (attribute)… …(mine was located in the v4.master as I got my master page from the CodePlex site.
a. C:\Program Files\Common Files\Microsoft Shared\Web Server Extensions\14\TEMPLATE\LAYOUTS\1033\STYLES\Themable\COREV4.CSS
b. Your Master Page (i.e, v4.master)
5. Lastly change the name of the body by removing the width, height, and overflow attributes from the “body” CSS rule from the above location (either your corev4.css file or in the master page)

Removing the left navigation bar (the Quick Launch) all together in SharePoint 2010.

In the master page (or even in a web part), add the following to the header (or within the HTML view of the content editor web part)
<style type="text/css">
/* removes the left quick launch */
#s4-leftpanel{
display:none
}
.s4-ca{
margin-left:0px
}
</style>
And villa… You should be all set..

I couldn’t have said it any better than they did in this article…
Go to Central Admin, and Central Administration, (It is recommended to do this in the server that you installed SharePoint, however I was unable to when doing so, so I went to my local machine.
Start the service User Profile Services
The rest I got from the link from above

Click "start" on "User Profile Synchronization Service" 
Click "OK" 

Click on "monitoring" on left hand side and then click on "Review Job Definitions" 
Click on "Running Jobs" on left hand side 
You should now see ProfileSynchronizationSetupJob running 
Keep refreshing until it disappears and then you’ll notice it’ll disappear. Click on "Job History" on left hand side, you should see the job with status of Successful. 
In Windows Services you should now see Forefront Services both started and running under your administrator account. 
Click on "Application Management" then click on "Manage service applications" 
Scroll down and click on "User Profile Service Application" 
Click on "Configure Synchronization Connections" 
NOTE: you may see the below error, if you do simply do an IISRESET 
Click Create New Connection 
Fill in details 
Click "Populate Containers" button then expand tree and select "Users" OU tree node and then click "OK".
NOTE: Clicking "Select All" does not work in this build! 
You should now see a connection in this list.
NOTE: if you get to next screen and nothing shows, please ensure both Forefront Windows Services are started. 
Go back to "User Profile Service Application" page from "Manage Service Applications" 
Click "Start Profile Synchronization" 
Select "Start Full Synchronization" then click "OK". 
NOTE: this will take a few minutes as a job is scheduled to do this. 
Now if you click "Manage User Profiles" you’ll see the User Profiles coming through 
In Beta 2 it is normal to see these warning errors in the Event Log. 
Also note that you cannot edit the connections because of a JavaScript error. 
For more information on the User Profile imports go to:
C:\Program Files\Microsoft Office Servers\14.0\Synchronization Service\UIShell\ and run MSIISClient.exe 

If you get this error:
"Cannot navigate to the requested page while User Profile Synchronization is running. Please wait for the current Sychronization run to finish."
You will need to restart the machine (you can most likely just restart the services too)
Installing HyperV Tools on your Windows 7 is easy. Simply download the RSAT (Remote Server Administration Tools) from Microsoft. Once you have installed the MSI, you will then need to go to “Turn Windows features on or off” from the Add and Remove Programs screen.

Select Remote Server Administration Services

Under Role Administration Tools, select Hyper-V Tools

After this, you should be set up. Go to Start, Administrative Tools, and select Hyper-V Manager.

In SharePoint (2007 or 2010) I had an issue where I can’t be RDP’ed in the machine and browse to the site. While I was on a Microsoft Call talking with a tech regarding a ticket that I had opened on another topic, I mentioned this as an issue, and he said we could fix it right now, so here is what we did:
Go to Start, type in REGEDIT and hit enter.
Then go to Computer\HKEY_LOCAL_MACHINE\SYSTEM\CurrentControlSet\Control\LSA and create a new DWORD “DisableLoopBackCheck” set it to a decimal and set to 1. This will allow you to brows to your own site.

I ran into an issue where I was sending emails to a document library, and though I had everything set up correctly, I was getting the following message:
Delivery has failed to these recipients or groups:
test@nav.yesprep.local
The recipient e-mail system can’t process this message now. Please try resending the message later.

This was a very simple fix. I added an A record to the site, and called it nav.yesprep.local pointing it to my server, however I didn’t add it as a binding in IIS as it seemed like everything else worked. So I added it, and it worked ASAP:


Within the SharePoint’s Front End Web Server box, you must enable the SMTP Service along with the IIS Manager for 6.0 to manage and configure it…

Select SMTP Server

Select Add Required Role Services

Select Next

Select Next

Select Install

After Installation, select Finish

Still in the SP Server, and from Start, select Administrative Tools >> Internet Information Services (IIS) 6.0 Manager

From IIS6.0, select the name of the server, then right click on SMTP Virtual Server #1 choose Properties…

Select “All except the list below” then choose OK

In Exchange Server you must create a Send Connector, go to the following path in the Exchange Management Console:
Organization Configuration >> Hub Transport >> Send Connectors >> New Send Connector

Enter a name of your SharePoint incoming mail connector, and select Internal

Click Add

Select the address…

Click Next

Click Add, then enter the IP Address

Click Next…

Ensure None is selected, then click Next…

Click Add, and add the name of the transport server…

Click New…

Click Finish…

In AD, add a new organizational unit

Call it something such as “SharePoint Contacts”

After creating it, select Delegate Control…

Click Next…

Click Add, and add the new service account

Select “Create a custom task to delegate…” Click Next

Select “This folder, existing objects in this folder, and creation of new objects in this folder”, then choose Next…

Ensure the Create All Child Objects and Delete All Child Objects are selected, then choose Next…

Click Finish…

Under AD, select View, and choose Advanced Features…

Select Properties…

Click on Advanced….

Select the service account for your SharePoint Central Admin App Pool User, click on Edit..

Enable Delete Subtree…, choose OK

Perform an IISReset in the primary SharePoint System.
In Central Admin, go to System Settings, then under E-Mail and Text Messages (SMS) select Configure Incoming Email Settings

Enable “Receive Email”, and enter the name of your server.

Now, add an MX Record in your primary DNS Server:

Enter the name of your MX Record host, as well as the FQDN (the name of the machine)

Next, test it, and you should be okay.
In Central Admin, go to System Settings, then under E-Mail and Text Messages (SMS) select Configure Outgoing Email Settings

Enter your Outbound SMT Server and From and Reply To address, then choose OK

Now under your Exchange Server, open up your Exchange Management Console and choose Hub Transport under Server Configuration, and double click Anonymous…

Now select the Network Tab, and select Add…
![]()
Enter the IP Address of your SharePoint server.
And then you should be finished!
To correctly set up the “My Site” you should put it in a different application domain. You will get the following message: Validate the My Site Host and Individual My Sites are on a dedicated Web application and separate URL Domain


Here is how to go about doing this:
Under Central Administration, select New to create a new site from the ribbon

Ensure that you have created an A record for “my” (or My Site)

Enter the following information as such:

You will get this message:

Now, create the site collection as a My Site Host

Ensure that you have Self Service Site Creation enabled

Click OK

You should be set!

The next step is to let SharePoint know that is where your default MySite is going to be located.
In Central Administration point to: Manage Service Applications under Application Management.

Select User Profile Service Application

Select Setup My Sites in My Site Settings

One last bit of configuration that I am noticing is that I cannot add new “My Content”. Here is how to fix that:
|
Your personal site cannot be created because the managed path "personal" has not been created for this site. Contact your site administrator for more information. |

Select your application, then choose Managed Paths in the ribbion

Type in “personal” in your path.

Select OK and you can test it now.
Works for me now!

Often it is needed that you set up an A Record (or a sub domain) to your new SharePoint site, here is how you do it.
I am looking to add nav.yesprep.local to access our new intranet site.
· I added the A Record in DNS and pointed it to the correct IP Address.
· Next you need to configure the alternate access mappings. From Central Administration, and under Application Management >> Web Applications >> Configure Alternate Access Mappings… 
· Click Add Internal URLs 
· Now select a site collection 
· Select you’re A Record (sub-domain name) 
· For the Zone, you want to make sure this says Intranet ![]()
After everything propagates you should be all set to go.

Over the last two weeks I have been trying to find the Adventure Works site theme… It was under my knows the whole time. I found it, and here is how.


Here is a great friend of mine’s blog: http://mstecharchitect.blogspot.com/
I RSS his feeds every day, and I have learned a lot of LINQ, C#, and a lot of other development stuff.
Please check it out!
I am in the process of moving all of my projects from the old TFS2008 to the new TFS2010, and I am in need of removing the old projects so that none of my developers use them.
To do this, first backup your TFS Database as you should have a maintenance plan for it anyway to backup, but be sure to double check for that.
Next, run navigate to the IDE location in the Command Prompt:
· x86 Systems – Enter: cd "Program Files\Microsoft Visual Studio 9.0\Common7\IDE"
· x64 Systems – Enter: cd "Program Files (x86)\Microsoft Visual Studio 9.0\Common7\IDE"
· Type in: c:\Program Files (x86)\Microsoft Visual Studio 9.0\Common7\IDE>TFSDeleteProject.exe /server:[TFSServer] "[ProjectName]"
For example: c:\Program Files (x86)\Microsoft Visual Studio 9.0\Common7\IDE>TFSDeleteProject.exe /server:cstfs1 "Business Intelligence" 
· Next you will see this message:
Warning: Deleting a team project is an irrecoverable operation. All version control, work item tracking and Team Foundation build data will be destroyed from the system. The only way to recover this data is by restoring a stored backup of the databases. Are you sure you want to delete the team project and all of its data (Y/N)?
· Select Y if you are 100% sure you want to do this

Done!
Okay, so it’s not directly related to SharePoint, but it is related to Team Foundation Server 2010. I am in charge of our software development team, and we use to be on TFS 2008 Workgroup Edition limiting 5 users. I had to remove myself and have a few folks share a user ID because a BI project we had (SSIS, SSRS, SSAS) was still on the 2008 TFS Server, and we have more than the 5 developers. I eventually added myself back, and decided that it is time to move projects to the new TFS2010.
I decided to move it all, however when I unbind, and rebind, I get the following message:
The solution is in a directory mapped to team server http://<Original_TFS_server_name>:<port>.
Continuing will close the existing team server Target_TFS_Server and open team server http://<Original_TFS_Server_name>:<port>/ Continue?

Okay, this is not cool! Why would I like to re bind to the old server, and why doesn’t it give me the option to connect to the new server?
Answer: Because VS 2008 is looking at the old Team Foundation Cache. Here are the steps to solve this issue that will connect your old project to the new team foundation server:
First with your Visual Studio project open, go to File, Source Control, and Change Source Control… 
Next, unbind all of he projects… 
Continued… 
All of your projects inside of your solution should now be unbound. 
Next, from the Tools Menu in Visual Studio 2008, select Connect To Team Foundation Server… 
Select the new 2010 server 
Close Visual Studio 2008.
Next, navigate in Explorer to the following path:
%userprofile%\AppData\Local\Microsoft\Team Foundation\2.0\Cache
Create a new folder called OldCache (or what ever you would like) 
Move all of the files and folders from %userprofile%\AppData\Local\Microsoft\Team Foundation\2.0\Cache to the new folder you just created. 
Open Visual Studio, while you are now connected to the new Team Foundation Server, open the new solution. From the File menu, select Source Control, then point to Add Solution to Source Control… 
Walla, you can now connect to your 2010 projects, and add this solution to the new TFS Server. 

You can reference this link from Microsoft for more information:
http://support.microsoft.com/kb/957110/en-us
Though unrelated to SharePoint 2010, I felt it needed to discuss my unique findings with TFS 2010 implementation with others. With the new TFS 2010 out, and as robust and great as it is, you still have old projects that you still need to maintain in VS2008. The problem is getting connected to TFS 2010 isn’t that easy because you now have a forward slash in your path. I will show you what I did to connect my VS2008 environment to TFS 2010 (Binding existing projects is a different story and the next blog)
Our Environment:
We have two TFS servers:
· CSTFS1 – Visual Studio Team Foundation Server 2008
· CSTFS01 – Visual Studio Team Foundation Server 2010
· CSDEV1 – Our Development Environment with Remote Desktop Services (Formally Terminal Services) running VS2008 (and soon 2010)
We tried to connect just simply, however we got the following message:
TF31002: Unable to connect to this Team Foundation Server: CSTFS01 Team Foundation Server URL: http://cstfs01:8080

To resolve this:
· Close Visual Studio! (Any and all versions)
· Ensure that you are running VS 2008 with Service Pack 1
· You must specify the URL as such: http://cstfs01:8080/tfs (or http://[TFSServer]:8080/[VirtualDirectory]/[ProjectCollection])
· Open regedit.exe and navigate to: [HKEY_CURRENT_USER\Software\Microsoft\VisualStudio\9.0\TeamFoundation\Servers]
o Add this string: “cstfs01″=http://cstfs01:8080/tfs (replacing your server names with your own)
· Open Visual Studio 2008, and point to your new TFS Server, and select your projects.
I created a text file (c:\add_tfs2010.reg) with the following text, and had all of my users execute it with administrative privliges:
Windows Registry Editor Version 5.00
[HKEY_CURRENT_USER\Software\Microsoft\VisualStudio\9.0\TeamFoundation\Servers]
“cstfs01″=”http://cstfs01:8080/tfs“
You can install SharePoint 2010 on your Windows 7 computer.
In my attempt to install SharePoint 2010 on my laptop computer for development reasons, I ran into quite a few issues. But I was determined.
But guess what… I was able to resolve it.


The Problems!
When installing SharePoint 2010 on Windows 7, even if you install all of its prerequisites that it says to install, you get one of these two errors:
An exception of type System.IO.FileNotFoundException was thrown. Additional exception information: Could not load file or assembly ‘Microsoft.IdentityModel, Version 3.5.0.0, Culture=neutral, PublicKeyToken=31bf3856ad364e35’ or one of its dependencies. The system cannot find the file specified.
-OR-
An exception oftype Microsoft.SharePoint.Upgrade.SPUpgradeException was thrown. Additional exception information: Failed to call GetTypes on assembly Microsoft.Office.Server.Search, Version=14.0.0.0, Culture=neutral, PublicKeyToken=71e9bce111e9429c. Could not load file or assembly ‘System.Web.DataVisualition, Version=3.5.0.0, Culture=neutral, PublicKeyToken=31bf3856ad364e35’ or one of its dependencies. The system cannot find thefile specified.
-OR-
Failed to create the configuration database.
An exception of the type Microsoft.SharePoint.SPException was thrown. Additional exception information: User cannot be found
(See both possible solutions below)
Below are the steps that I took to get these errors.
Installed SQL Server 2008 R2, Installed SharePoint 2010 (with its prerequisites first).
Went to Start, SharePoint 2010 Central Administraton


Clicked Yes

Clicked Next

WARNING: you are installing on windows vista or windows 7, which are unsupported configurations intended for use on developer workstations only. This configuration should not be used as a production environment, or host any user content.
Clicked OK

Clicked Yes
You might get one of the errors below:

An exception of type System.IO.FileNotFoundException was thrown. Additional exception information: Could not load file or assembly ‘Microsoft.IdentityModel, Version 3.5.0.0, Culture=neutral, PublicKeyToken=31bf3856ad364e35’ or one of its dependencies. The system cannot find the file specified.
Click Finish.
The problem is that the Windows Identity Foundation pack was not installed. This can be fixed here: http://www.microsoft.com/downloads/details.aspx?FamilyID=eb9c345f-e830-40b8-a5fe-ae7a864c4d76&displaylang=en#filelist
-OR-

An exception oftype Microsoft.SharePoint.Upgrade.SPUpgradeException was thrown. Additional exception information: Failed to call GetTypes on assembly Microsoft.Office.Server.Search, Version=14.0.0.0, Culture=neutral, PublicKeyToken=71e9bce111e9429c. Could not load file or assembly ‘System.Web.DataVisualition, Version=3.5.0.0, Culture=neutral, PublicKeyToken=31bf3856ad364e35’ or one of its dependencies. The system cannot find thefile specified.
Click Finish.
The problem is that the Chart Controls cannot be found, you can download them here: http://go.microsoft.com/fwlink/?LinkID=122517
-OR-

Failed to create the configuration database.An exception of the type Microsoft.SharePoint.SPException was thrown. Additional exception information: User cannot be found
Alright, this one is rather funny. You can get this message if you are working from home, not connected to the network via VPN. That was my case. The user just cannot be found that is part of the domain for creating the SQL Server connection.
SUCCESS!!!
![clip_image002[1]](https://myspexp.files.wordpress.com/2010/06/clip_image00211.jpg "clip_image002[1]")
That all worked for me, hope it works for you!
If you have more errors, then you can follow this: http://msdn.microsoft.com/en-us/library/ee554869(office.14).aspx, however some of the links are broken.
So, I have a project that I am working on, and I felt because there is always a lack of documentation out there for SharePoint (especially 2010) I felt that I should publish my own blog as I go. I will be posting all of my content here. I am moving our Intranet system from SharePoint 2007 to SharePoint 2010. We are starting fresh, I will be building a series of applications to move old content to our new site, however the site map will change a little bit, so there will be quite a few challenges.
I will also be adding my own branding, so as I work on our intranet site, getting it all up and done, I hope to help you out with yours by posting my experiences.
Hello all,
Welcome to one of my blogs talking about my SharePoint Experiences. I am planning on posting all of my experience and tools in my SharePoint Development here.
Here is how to center the width of the body in SharePoint 2010, you use the nosetwidth class for the workspace.
<div id=”s4-workspace” class=”s4-nosetwidth” style=”position:relative; width:1024px; margin-right:auto; margin-left:auto; background:white;”>


